How to Fix Laptop Touchpad Not Working (All Brands & Windows Versions)
Your laptop touchpad suddenly stopped working and you have no idea why. You are not alone, as this is one of the most common laptop issues people face, and the good news is that most of the time, the fix takes less than two minutes.
In this guide, Tech Point Zone walks you through every working fix, from a simple keyboard shortcut to driver updates and brand-specific solutions for Dell, Lenovo, HP, and ASUS. No technical background needed.
How to Fix Laptop Touchpad Not Working
The fastest fix is to press the touchpad shortcut key on your keyboard, usually Fn + F6, Fn + F7, or Fn + F8 depending on your laptop brand. Look for a key with a small touchpad icon and press it while holding Fn. This re-enables the touchpad in seconds if it was accidentally turned off.
If that does not work, try these steps in order. Most people find the fix within the first three.
Why Is Your Laptop Touchpad Not Working?
Here are the most common reasons:
- Touchpad accidentally disabled: The most common cause. A single key press can turn it off without you realising. The laptop touchpad not working shortcut key issue catches many people off guard.
- External mouse connected: Many laptops automatically disable the touchpad when a USB or Bluetooth mouse is plugged in. If your laptop touchpad not working but mouse does, this is likely why.
- Outdated or corrupted driver: After a Windows update, touchpad drivers sometimes break. The touchpad stops responding completely.
- Touchpad toggle in Settings is off: Windows has a separate toggle in Settings that can get switched off.
- BIOS setting disabled: Less common, but some laptops have the touchpad disabled at the BIOS level, which prevents it from working regardless of any software fix.
- Physical dirt or damage: Dust, liquid, or pressure damage can cause a non-responsive laptop touchpad.
Fix: Use the Touchpad Shortcut Key
Press Fn + F6, Fn + F7, or Fn + F8 to toggle the touchpad on. Look for the function key that has a touchpad icon printed on it. It varies by brand.
| Brand | Touchpad Shortcut |
|---|---|
| HP | Fn + F7 |
| Dell | Fn + F5 |
| Lenovo | Fn + F6 or Fn + F8 |
| ASUS | Fn + F9 |
| Acer | Fn + F7 |
Press the key combination once and test your touchpad. If the touchpad still does not respond, move to the next fix.
Fix: Check Touchpad Settings in Windows
Go to Settings > Bluetooth & Devices > Touchpad (Windows 11) or Settings > Devices > Touchpad (Windows 10) and make sure the touchpad toggle is switched On.
This is the second most common reason for laptop touchpad issues, the toggle gets switched off after a Windows update or by another user.
If you see the toggle is already on and the touchpad is still not responding, disconnect any external mouse or USB device connected to the laptop and test again. Many laptops disable the touchpad automatically when a mouse is connected.
How to Fix Laptop Touchpad Not Working Windows 11
On Windows 11, the touchpad settings moved to a new location. Here is exactly where to find them and what to check:
Step 1: Open Touchpad Settings
Press Windows + I to open Settings. Go to Bluetooth & Devices then click Touchpad. Make sure the toggle at the top is turned On.
Step 2: Check the “Leave Touchpad On” Option
Scroll down inside Touchpad settings and look for “Leave touchpad on when a mouse is connected.” Turn this on if you want the touchpad to stay active even when an external mouse is plugged in. This single setting fixes the issue for a lot of Windows 11 users.
Step 3: Run the Hardware Troubleshooter
Go to Settings > System > Troubleshoot > Other Troubleshooters. Find Hardware and Devices and click Run. Windows will scan for issues and attempt to fix them automatically. Restart after it completes.
Step 4: Check for Windows Updates
Go to Settings > Windows Update and install any pending updates. Microsoft regularly pushes touchpad driver patches through Windows Update, especially after major feature updates.
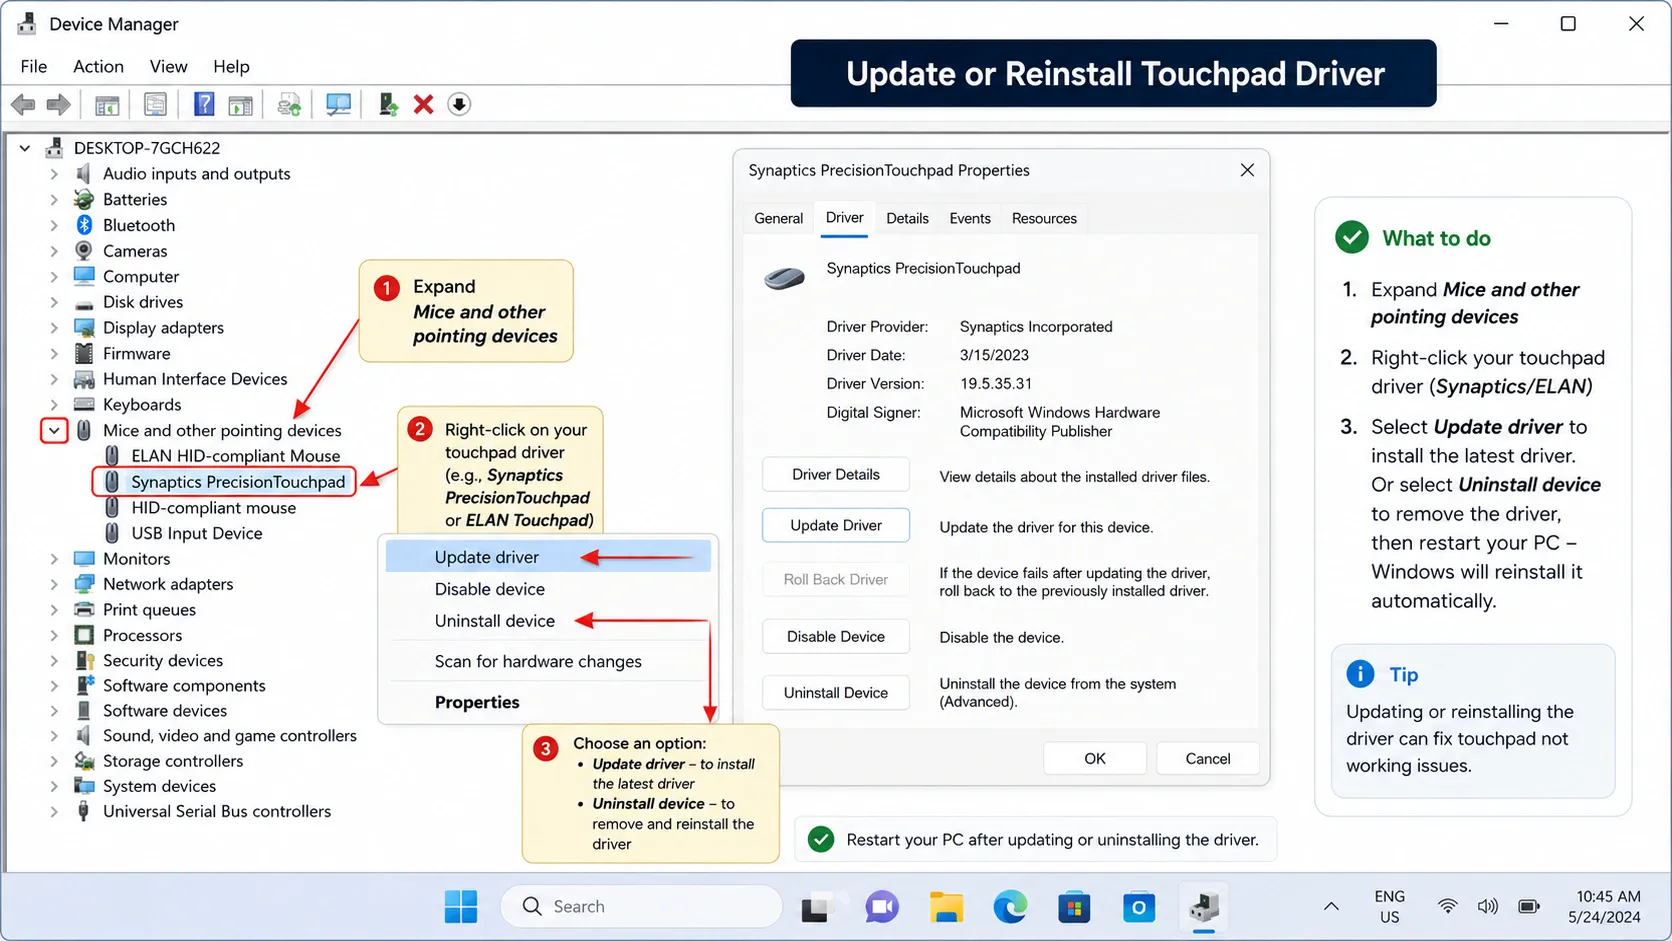
Fix: Update or Reinstall the Touchpad Driver
An outdated or broken driver is a very common reason the touchpad suddenly stopped working after a Windows update. Here is how to fix it.
- Press Windows + X and click Device Manager
- Expand Mice and other pointing devices
- Right-click your touchpad (usually listed as HID-compliant touchpad, Synaptics, or ELAN)
- Click Update driver and select Search automatically
- Restart your laptop and test
If updating does not work, right-click the touchpad driver and select Uninstall device. Restart your laptop. Windows will automatically reinstall the driver on startup. This clears out any corrupted driver files causing the laptop mouse touchpad not working issue.
Fix: Enable Touchpad in BIOS
If nothing above has worked, the touchpad may be disabled at the BIOS level. This is more common on business laptops managed by a company IT team.
- Restart your laptop
- Press F2, F10, Del, or Esc immediately as the laptop starts (the key varies by brand; it usually shows briefly on screen)
- Navigate to Advanced or Internal Pointing Device settings using arrow keys
- Set the touchpad to Enabled
- Press F10 to save and exit
- Restart and test
How to Fix Laptop Touchpad Not Working Lenovo
On Lenovo laptops, the touchpad is called the TrackPad or ClickPad. Press Fn + F6 to toggle it on, this is the most common fix for Lenovo touchpad issues.
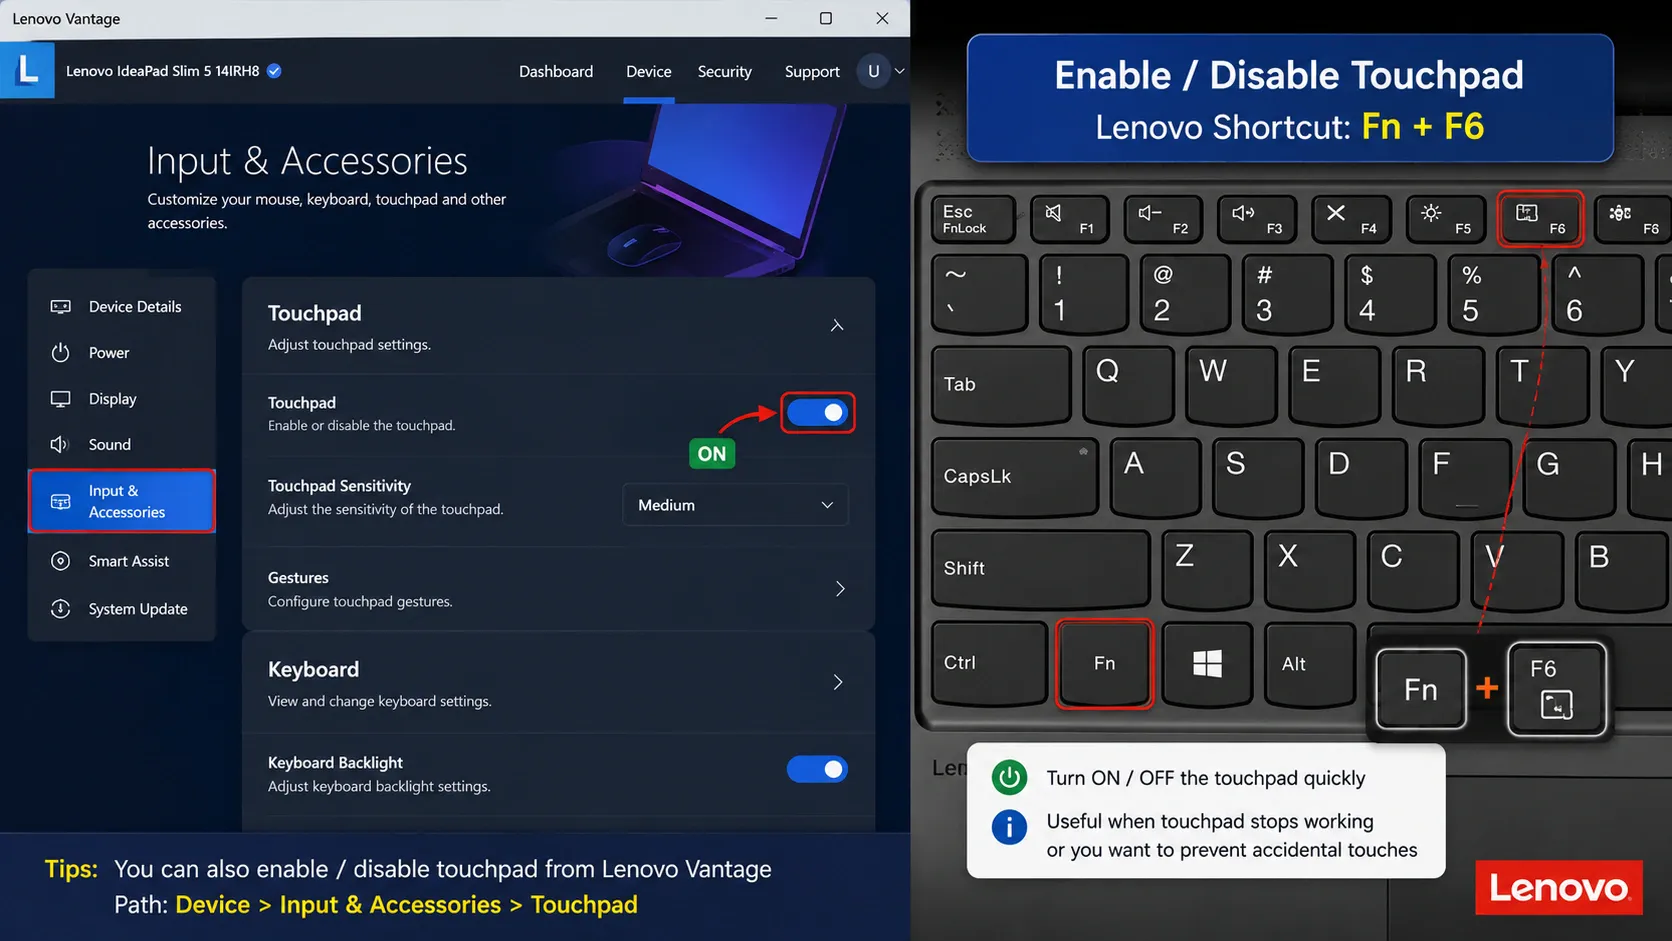
If the shortcut does not work, try this:
Check Lenovo Vantage
Open Lenovo Vantage (pre-installed on most Lenovo laptops). Go to Hardware Settings > Input & Accessories. Make sure the touchpad is not disabled here. Lenovo Vantage has its own separate toggle that overrides Windows settings.
Update Lenovo Touchpad Driver
Visit support.lenovo.com, enter your laptop model, and download the latest touchpad driver for your version of Windows. Lenovo uses Synaptics or ELAN touchpad drivers depending on the model. Install the downloaded driver and restart.
Check for Lenovo BIOS Update
Some Lenovo models had a known bug where a BIOS update disabled the touchpad. Go to Lenovo Vantage > System Update and install any available BIOS or firmware updates.
Lenovo ThinkPad users, if your touchpad works but the laptop touchpad not clicking issue persists, go to Mouse Settings > Additional Mouse Settings > ThinkPad tab and check the ClickPad settings there.
How to Fix Laptop Touchpad Not Working Dell
On Dell laptops, press Fn + F3 or look for the touchpad icon key to re-enable it. Dell XPS, Inspiron, and Latitude models each handle touchpad settings slightly differently.
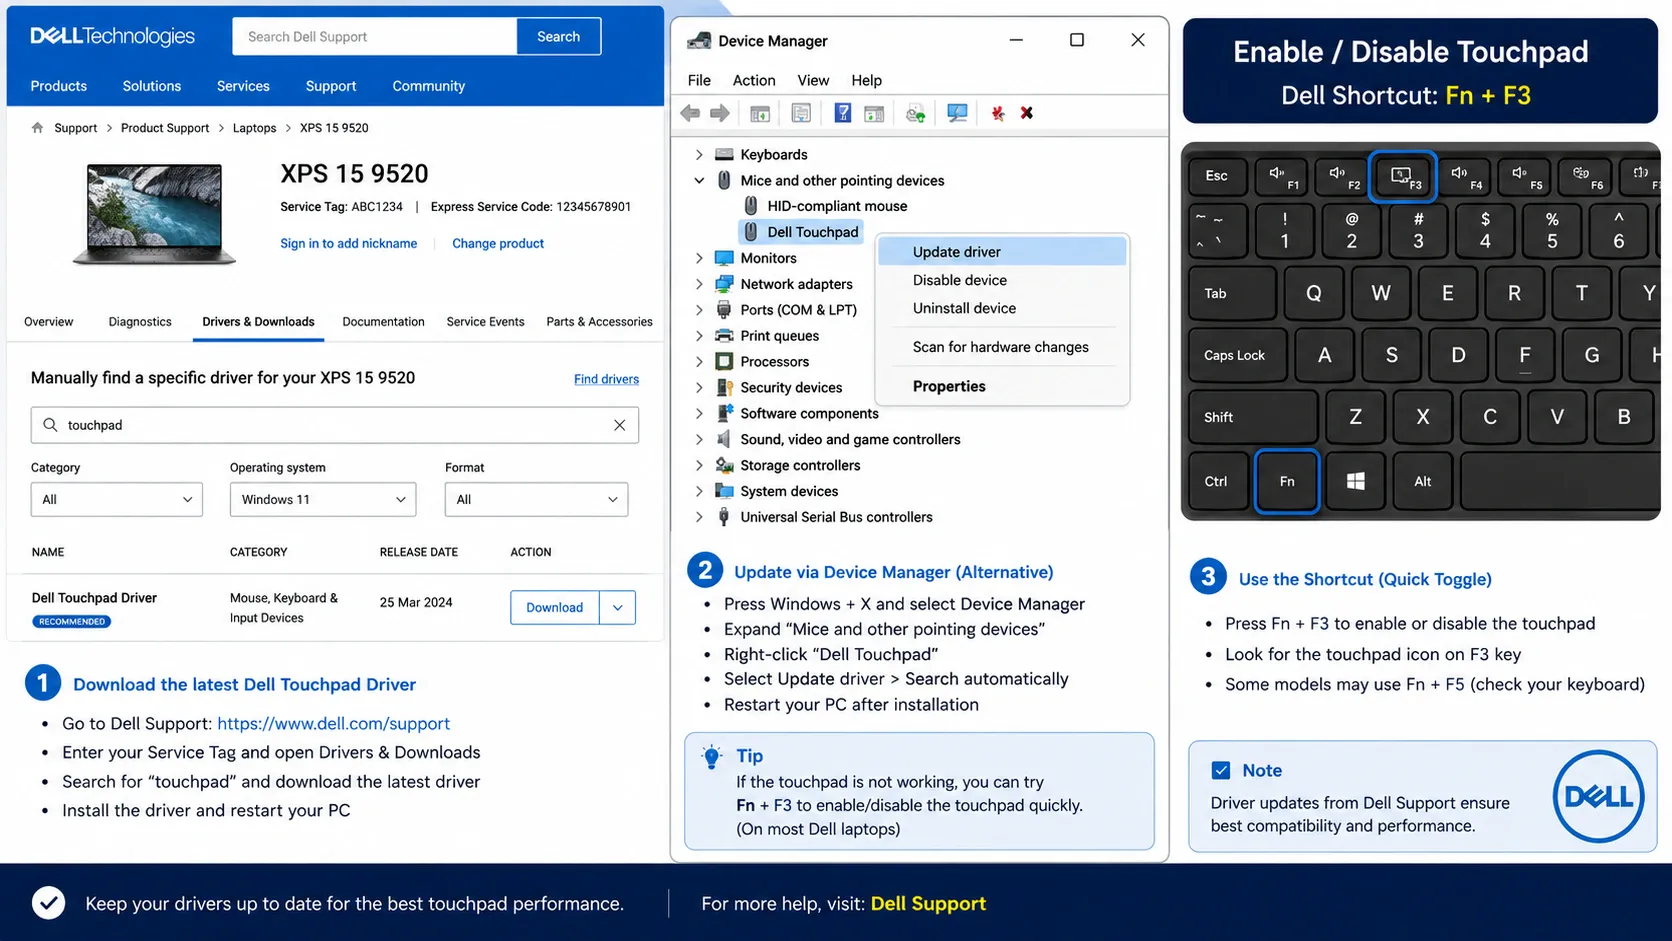
Check Dell Touchpad Settings
- Go to Settings > Bluetooth & Devices > Touchpad
- Scroll to the bottom and click Additional Settings or Open Mouse Properties
- Go to the Device Settings or Dell Touchpad tab
- Make sure the touchpad is listed as Enabled
Reinstall Dell Touchpad Driver
Go to dell.com/support, enter your Service Tag (found on the bottom of your laptop), and download the latest touchpad driver. Dell uses Alps, Synaptics, or ELAN touchpad drivers. Install the correct one for your model and restart.
Dell-Specific Issue: Touchpad Disabled After Windows Update
Dell Inspiron and XPS users frequently report that the touchpad stops working after a Windows feature update. The fix is to uninstall the current driver from Device Manager, then install the driver downloaded directly from Dell’s support page, not the one Windows installs automatically.
If your Dell touchpad is still non-responsive after all of the above, boot into Dell SupportAssist (press F12 at startup and select Diagnostics) to run a hardware test on the touchpad.
Fix: Disable Power Management for the Touchpad
Windows sometimes turns off the touchpad to save battery, this can make it seem like a hardware fault when it is just a power setting.
- Open Device Manager (Windows + X)
- Expand Mice and other pointing devices
- Right-click your touchpad and select Properties
- Go to the Power Management tab
- Uncheck Allow the computer to turn off this device to save power
- Click OK and restart
This fix is especially useful if your touchpad works fine after a full restart but stops responding after the laptop wakes from sleep.
Fix: Check for Third-Party App Conflicts
Some apps, particularly touchpad gesture tools, driver utilities, or antivirus software, conflict with the touchpad driver and cause it to stop working.
Restart your laptop in Safe Mode to test this:
- Hold Shift and click Restart from the Start menu
- Go to Troubleshoot > Advanced Options > Startup Settings > Restart
- Press 4 to boot into Safe Mode
If the touchpad works in Safe Mode, a third-party app is causing the conflict. Go to Settings > Apps and uninstall any recently added touchpad utilities, gesture apps, or driver tools.
Fix: Clean the Touchpad Surface
A dirty touchpad surface can cause it to become unresponsive or erratic. This is a physical fix many people overlook.
Turn off your laptop. Wipe the touchpad surface with a slightly damp microfibre cloth. No liquid cleaners. Pay attention to the edges where dust and oil build up. Dry it fully before turning the laptop back on.
If your hands are dry or cold when using the touchpad, that can also reduce sensitivity. The touchpad reads body heat. Warm your hands and try again.
Fix: Perform a System Restore
If your touchpad suddenly stopped working after a Windows update or system change, rolling back to a previous restore point can fix it immediately.
- Type System Restore in the Windows search bar
- Click Create a Restore Point
- In the window that opens, click System Restore
- Choose a restore point from before the touchpad stopped working
- Follow the steps and restart
This does not delete your personal files. It only reverses system and driver changes made after that restore point.
When to Get Your Laptop Checked
If you have tried every fix above and the touchpad still does not work, the issue is most likely hardware, a loose internal cable, a damaged touchpad unit, or a motherboard fault. At that point, the laptop needs a physical inspection.
At Tech Point Zone in Dubai, we see this most often in laptops that have been dropped or had liquid spill near the keyboard. The touchpad cable runs underneath the keyboard on most models and is one of the first things to loosen after impact.
Before taking your laptop in for repair, check if your laptop is still under warranty, Dell, Lenovo, HP, and ASUS all have UAE service centres that cover hardware defects.
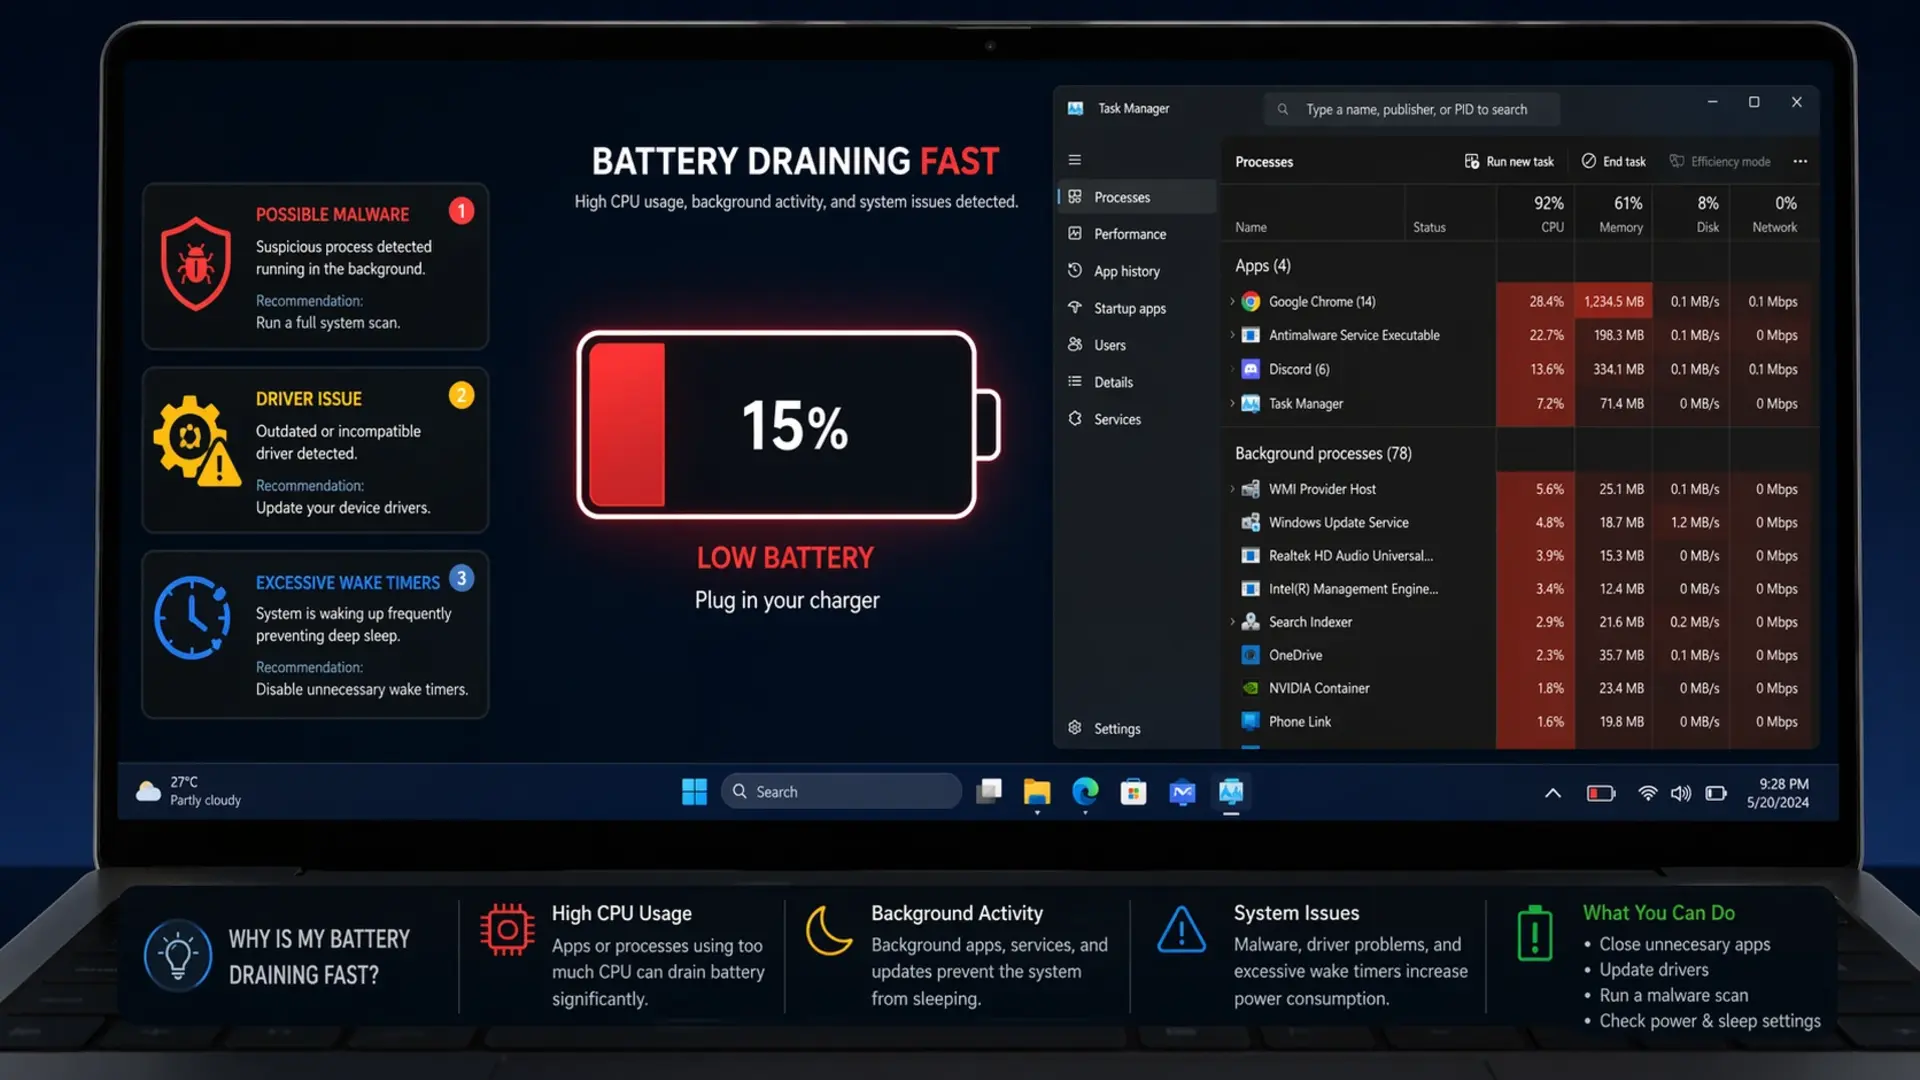
If your laptop has other performance issues alongside the touchpad problem, it may be worth reading our guide on how to fix laptop battery draining fast. Sometimes the same Windows update that breaks the touchpad also affects power management.
Touchpad Not Working on a Specific Brand? Quick Reference
| Brand | First Thing to Try | Driver Source |
|---|---|---|
| HP | Fn + F7, then check Settings | support.hp.com |
| Dell | Fn + F3, then Dell Support page | dell.com/support |
| Lenovo | Fn + F6, then Lenovo Vantage | support.lenovo.com |
| ASUS | Fn + F9, then MyASUS app | asus.com/support |
| Acer | Fn + F7, then Device Manager | acer.com/support |
If you are not sure which laptop brand is most reliable for hardware longevity, take a look at our breakdown of the best laptop brands in the world, it covers build quality and after-sales support for every major brand available in the UAE.
Tips to Prevent Touchpad Issues in the Future
Keep your drivers updated: Check Device Manager or your brand’s support page every few months. Touchpad drivers are updated frequently, and outdated ones cause most of the issues covered in this guide.
Do not eat or drink near your laptop: Oil from food and liquid are the two biggest causes of physical touchpad failure.
Disable the touchpad when using a mouse: If you always use an external mouse, go to Settings > Touchpad and disable it. This prevents accidental cursor movements and reduces wear on the touchpad.
Clean the surface regularly: A quick wipe once a week keeps the touchpad responsive and avoids sensitivity issues.
Avoid heavy pressure: Pressing hard on the laptop touchpad not clicking issue is often made worse by users pressing harder. Firm but light taps are all it needs.
If you ever need to do a full system reset and want to know what that involves, our guide on how to reformat a laptop walks you through the entire process safely.
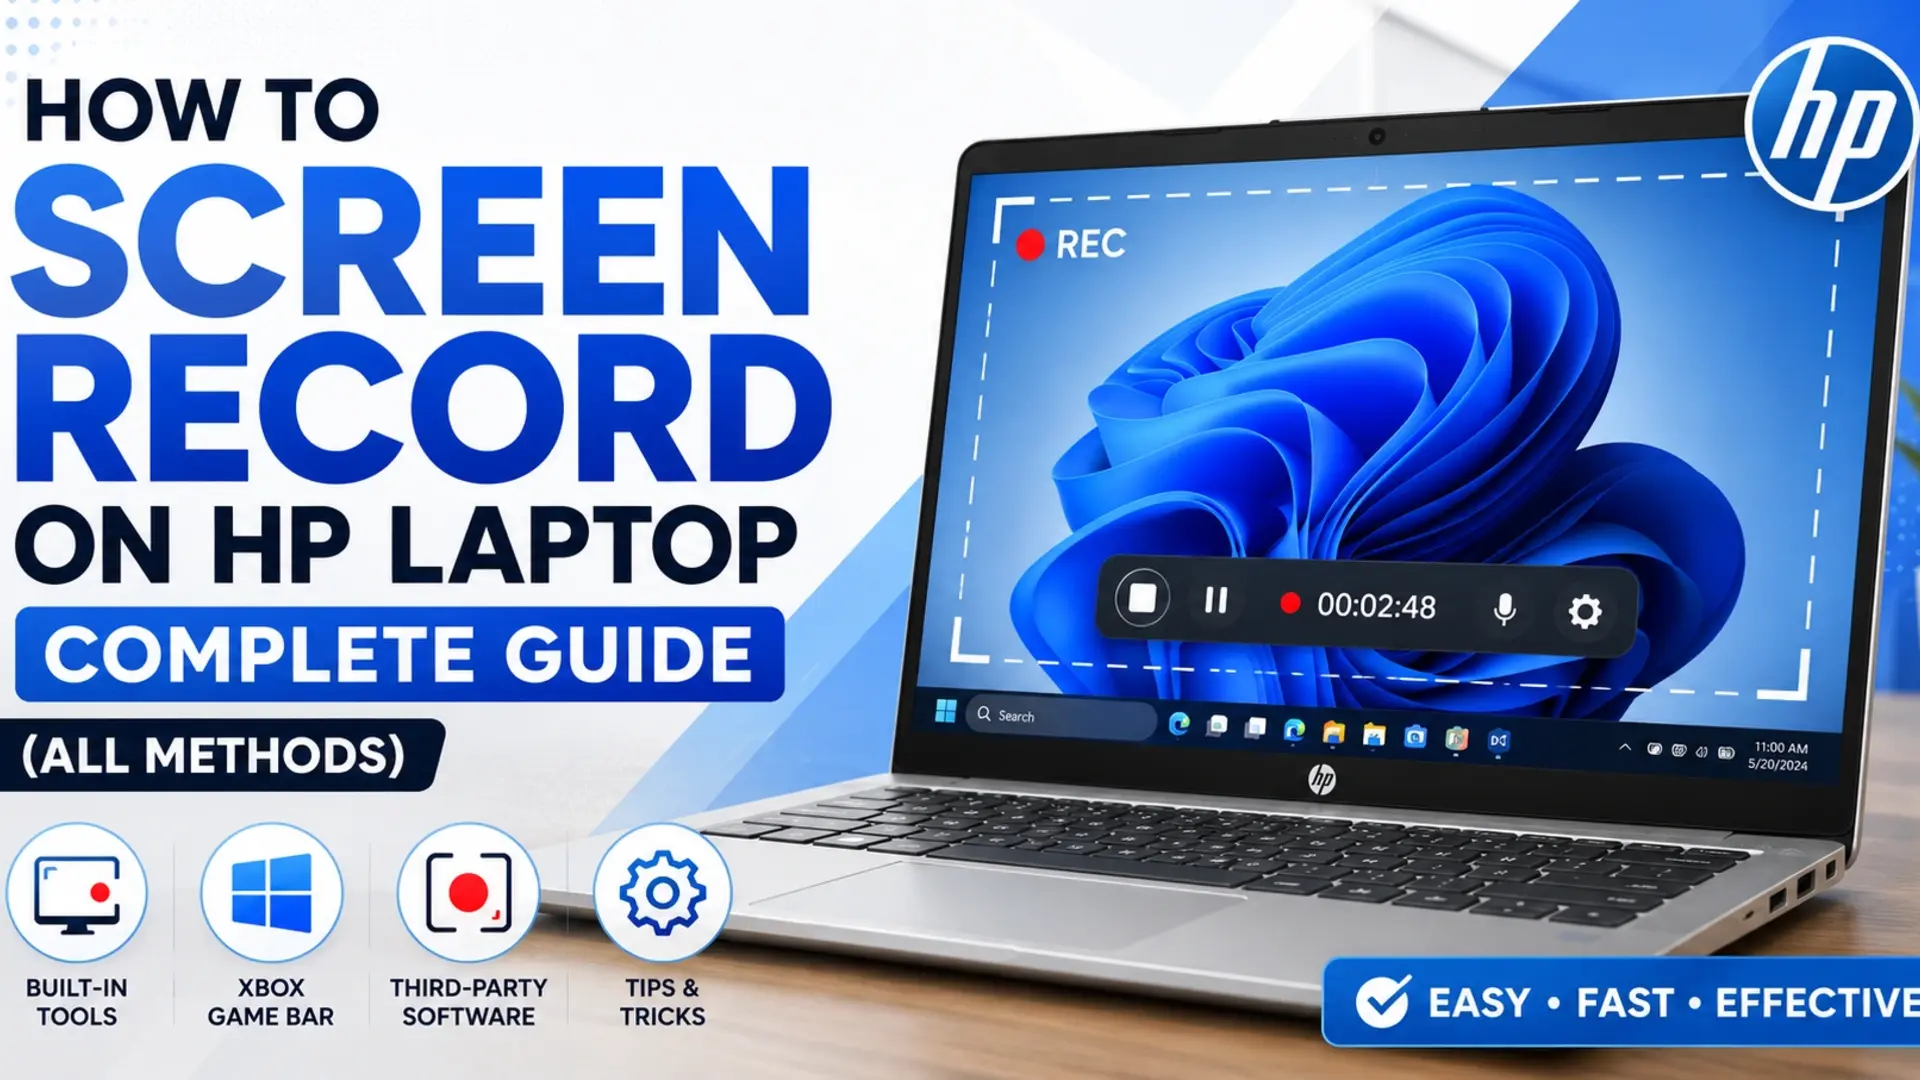
And if you use your laptop for recording tutorials or work sessions, check out how to screen record on HP laptop for a simple step-by-step guide.
FAQ
How do I turn my touchpad back on?
Press Fn + F6, Fn + F7, or Fn + F8, depending on your laptop brand. Look for the key with a touchpad icon. You can also go to Settings > Bluetooth & Devices > Touchpad and switch the toggle on from there.
How do I unfreeze my touchpad?
First try pressing the touchpad shortcut key (Fn + touchpad icon key). If that does not work, restart your laptop. If it still does not respond, go to Device Manager, uninstall the touchpad driver, and restart. Windows will reinstall it automatically.
How to fix an unresponsive touchpad?
Start with the shortcut key, then check Settings to confirm it is enabled. Next, update or reinstall the driver from Device Manager. If none of that works, check BIOS settings to make sure the touchpad is not disabled at the firmware level.
How can I reset my touchpad?
Go to Settings > Bluetooth & Devices > Touchpad and scroll down to find the Reset button under your touchpad gestures settings. This resets all touchpad preferences back to default without affecting your drivers.
Why is the touchpad disabled?
The most common reasons are: the Fn shortcut key was pressed accidentally, an external mouse was connected and triggered auto-disable, a Windows update changed driver settings, or the touchpad was disabled in BIOS. Start with the shortcut key fix and work through the steps above.
Conclusion
A laptop touchpad not working is rarely a serious problem. In most cases, pressing the shortcut key, checking Windows settings, or updating the driver gets it working again within minutes. Dell, Lenovo, HP, and ASUS users each have brand-specific steps worth trying if the basic fixes don’t help.
If your touchpad still doesn’t respond after trying everything in this guide, it’s likely a hardware issue that needs a professional look. At Tech Point Zone, we help UAE customers diagnose and fix laptop hardware problems every day, so if your touchpad still won’t cooperate, our team is ready to help.